Dotfile Goodness, Vim!
6 min readThis post focuses on Vim and is a part of a series of posts describing my development environment: zsh, Vim, tmux, etc.
This is my primary motivation for this post:
So let's get started
⇛ Installing Vim (optional)
Chances are you already have Vim on your system if you're on a Unix or Unix-like system.
On a Mac, you can get the most recent version of Vim with Homebrew, the one and only package manager :p.
$ brew install vim
Ubuntu:
$ sudo apt-get install vim
⇛ Vim Modes
People in the Vi(m) community do not really agree on how many modes there are,
but hey let me add to the confusion/debate.
The main things you'll find yourself doing include:
- entering some sort of command or key combos which manipulate text, files...
- actually entering text, that's what a text editor should do right
With that out of the way, there's the:
Normal Mode
This is the default mode you'll find yourself in, each time you're in Vim. In this mode you can navigate your way through text with hj kl. These conveniently happen to be home row keys as well.
- h moves one character to the left.
- j moves down a line.
- k moves up a line.
- l moves one character to the right.
The following keys make movement simpler as well
- 0 moves the cursor to the beginning of the line.
- $ moves the cursor to the end of the line.
- w move forward one word.
- b move backward one word.
- G move to the end of the file.
- H move to the top of the screen
- M move to the middle the screen
- L move to the bottom of the screen
- gg move to the beginning of the file.
- `. move to the last edit.
` It's in this mode that you can perform a number of verbs and modifiers on nouns(to borrow heavily from Yan Pritzker's Vim lingo).
Then there's the:
Insert Mode
This mode allows you to enter text. While you can use commands in a special mode–insert normal
mode(C-o i.e ctrlo), Vim's insert mode is specialized
for one task–entering text.
Enter insert mode with i
You can use one of the following to get back to normal mode:
- esc
- ctrl[]
Visual Mode
In this mode we can define a selection of text and then perform some operations on the text. This mode is accessible with the v key, when coming from the normal mode. There are 3 visual modes though depending on what you're trying to achieve.
- Character-wise,v
- Line-wise, V i.e (⇧ + v)
- Block-wise,ctrlv
Hitting esc will almost always get you back into normal mode.
And finally if you haven't found how to exit Vim yet, you're not alone.
I've been using Vim for about 2 years now, mostly because I can't figure out how to exit it.
— I Am Devloper (@iamdevloper) February 17, 2014
To exit vim:
- :q to quit
- :wq to save changes and quit
- :q! to quit discarding changes
⇛ Vimtutor
If you're trying out Vim for the first time though, I can't recommend vimtutor enough. It's by far the quickest way to get familiar with basic key movements, verbs, etc. etc...
It comes as part of the vim installation process. Just invoke it at the terminal:
$ vimtutor
⇛ General Customizations
I always remap my ⇪ into an extra esc key. I don't use the caps lock key anyway.
On a Linux system, I do this with xmodmap. On a Mac, I achieve something similar with a combination of Karabiner, formerly known as KeyRemap4MacBook, & Seil.
⇛ My Vim Configuration
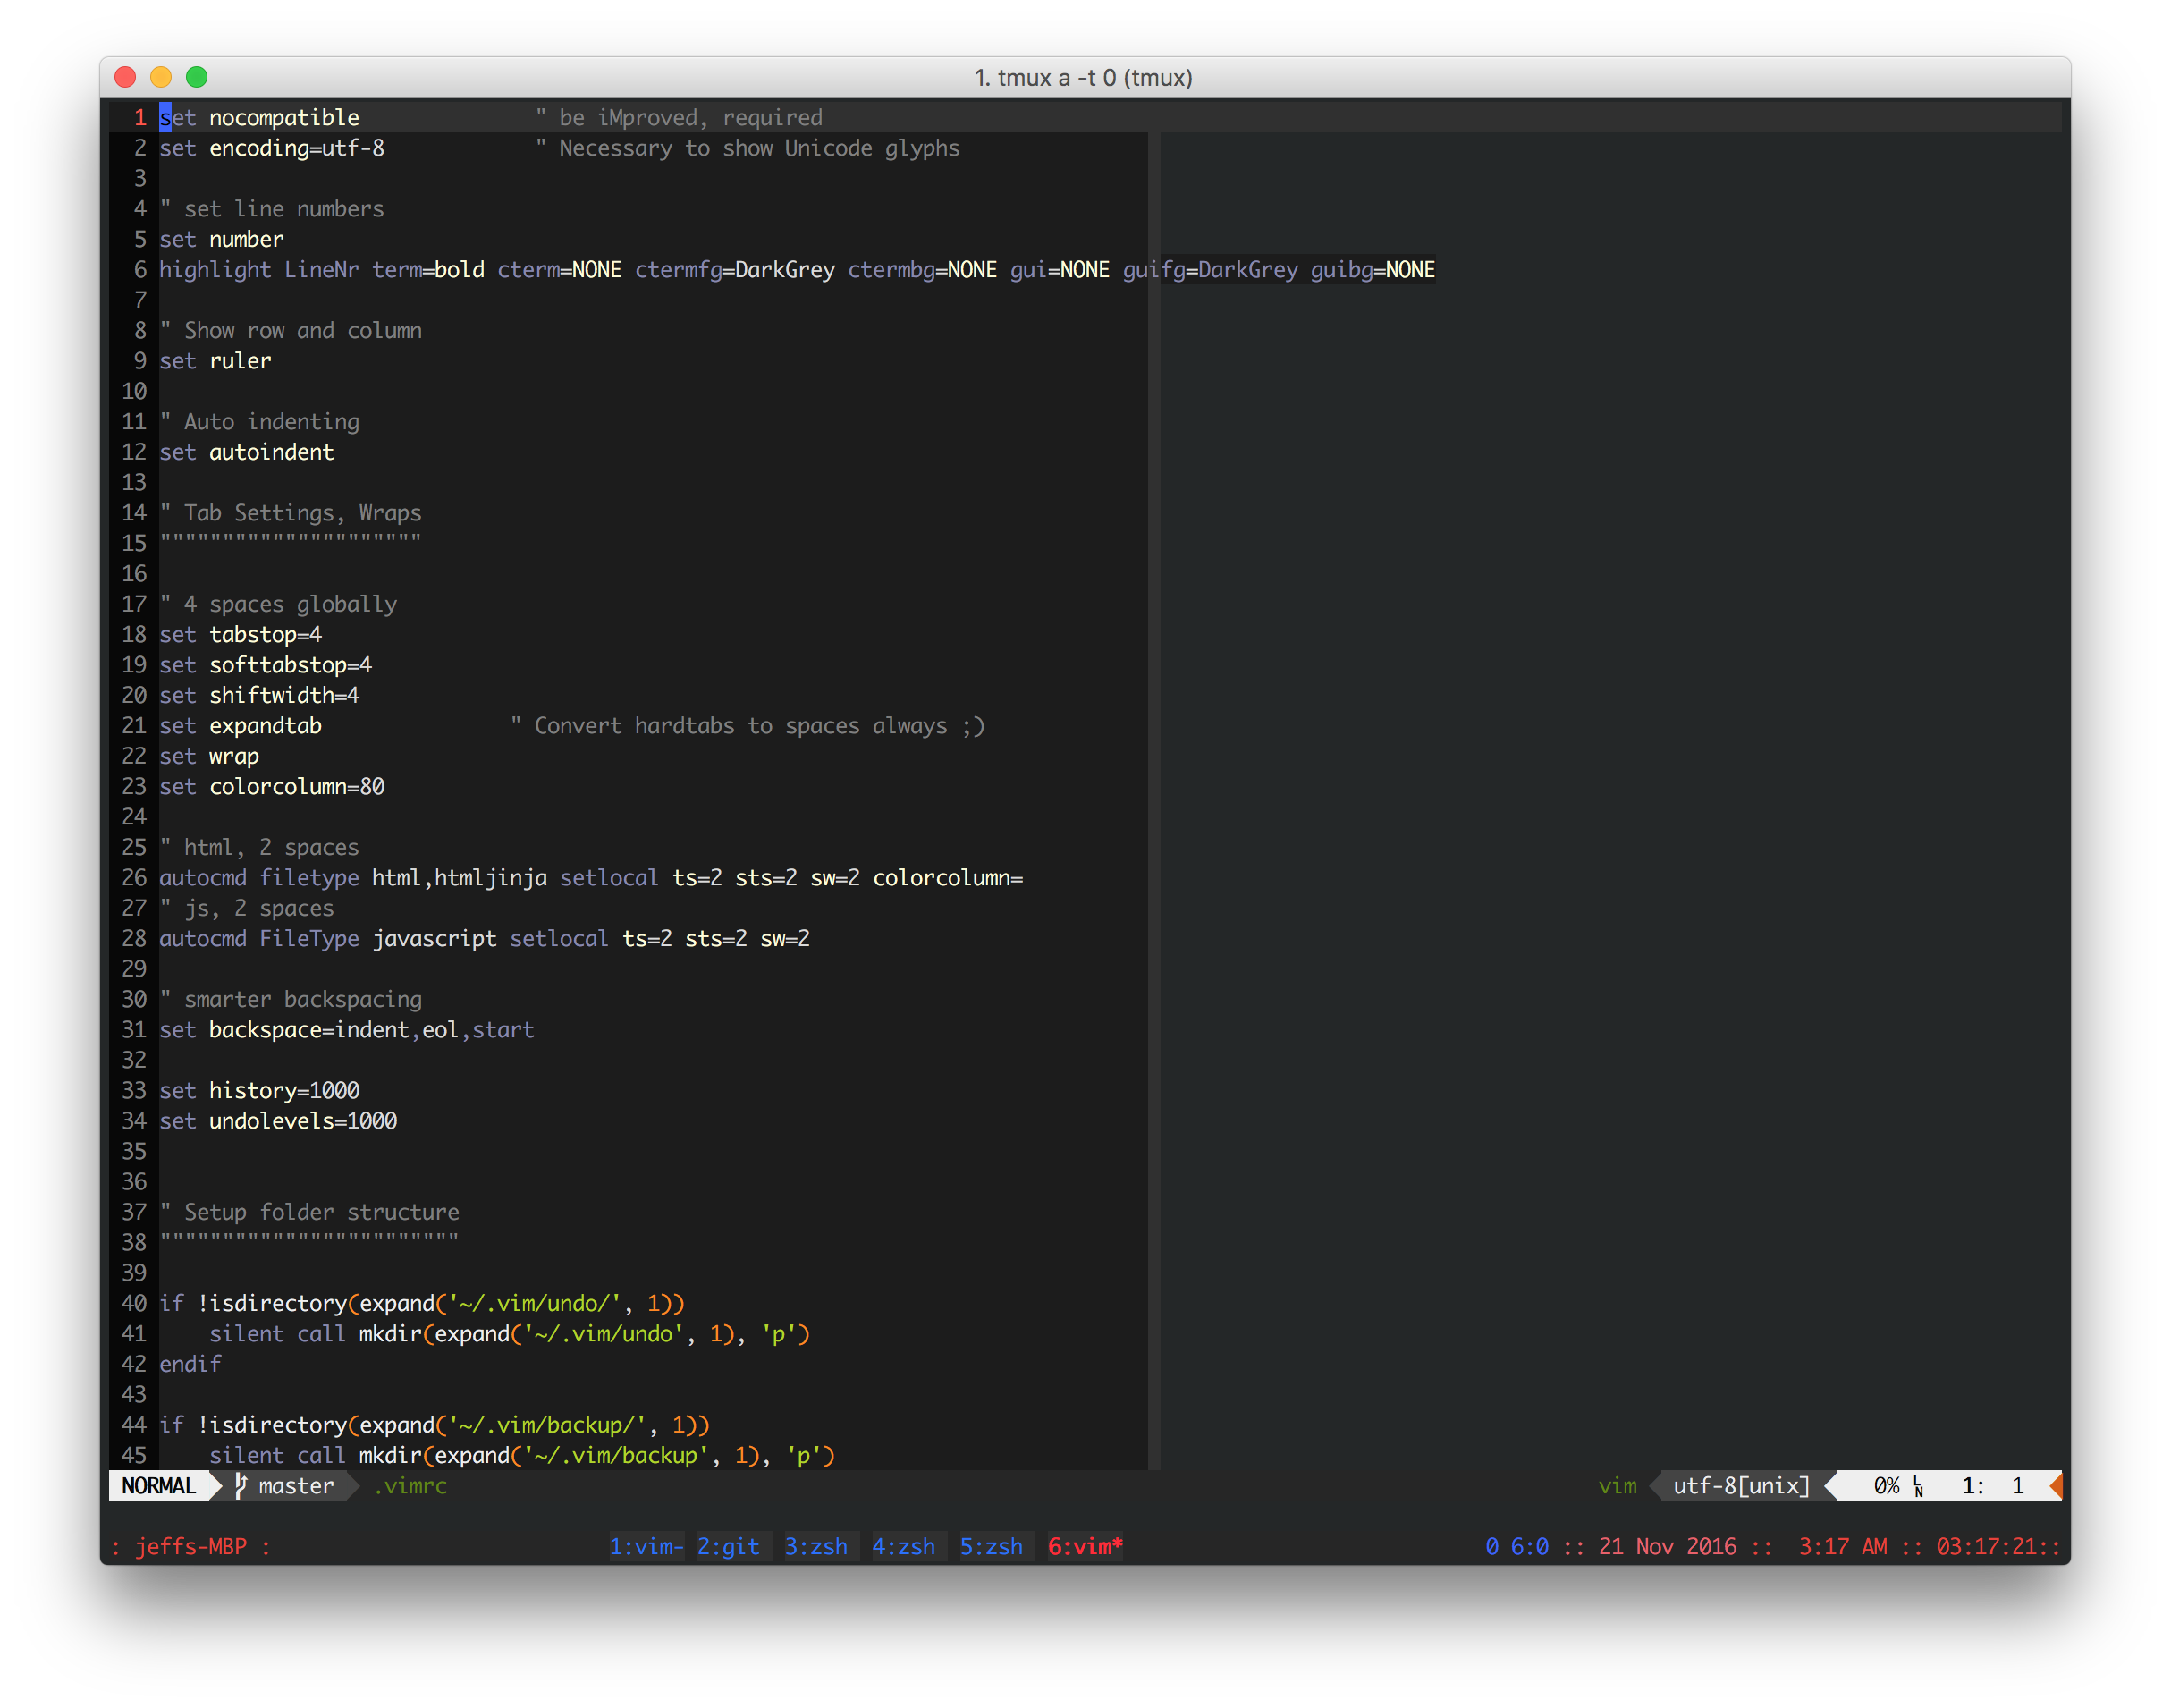
In this section I'll attempt at explaining some of the general settings I've set up in my vimrc–Vim's config file.
$ vim ~/.vimrc
Within vim, I also remap ; to : in normal mode.
nnoremap ; :
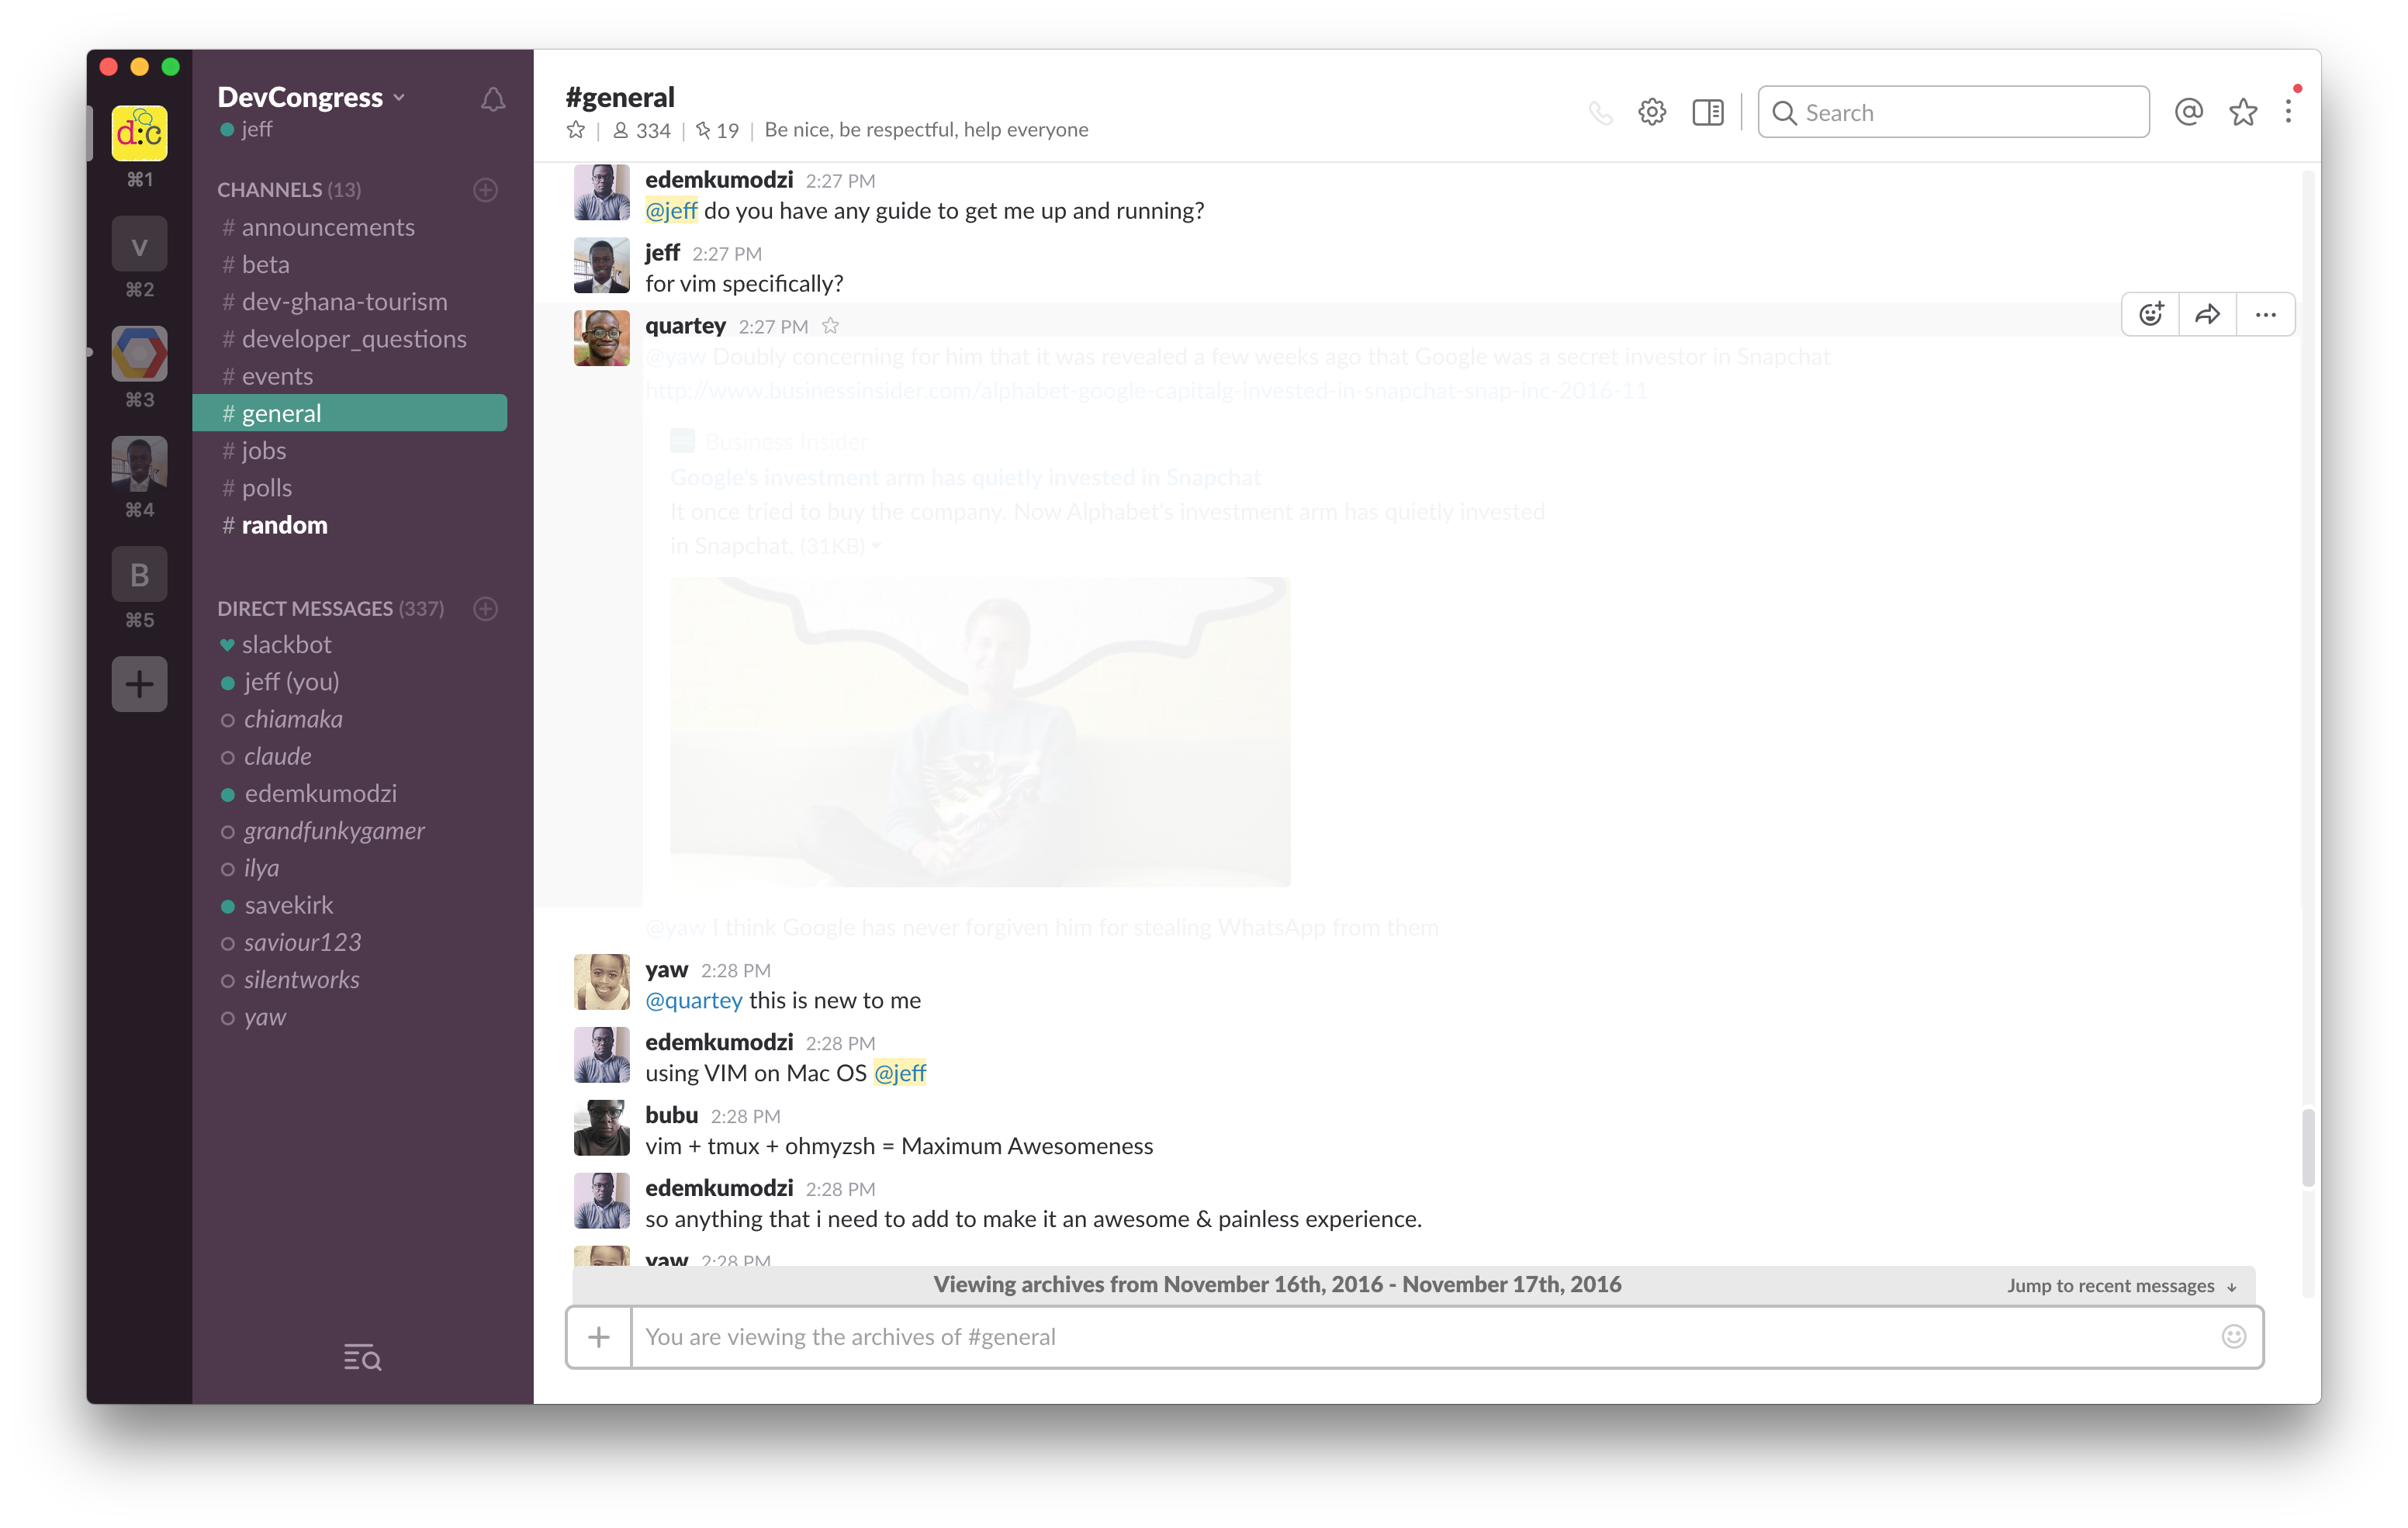
not using the mouse in vim is so 1970. in the 1980 we also stop moving around with the arrow keys 😎 beat that! Posted in #general Nov 17th at 2:23 PM
It helps to just get rid of the mouse. While at it, get rid of the arrow keys as well. You'll become a pro in moving with the "right" keys in no time at all.
Adding this to your .vimrc disables the arrow keys in insert and normal mode
nnoremap <up> <nop>
nnoremap <down> <nop>
nnoremap <left> <nop>
nnoremap <right> <nop>
inoremap <up> <nop>
inoremap <down> <nop>
inoremap <left> <nop>
inoremap <right> <nop>
Although I don't agree with the mouse part, it can come in handy:
set mouse=a
Some sane defaults for searching:
set hlsearch    " highlight searches "
set ignorecase  " ignore case "
set smartcase   " smart search "
With both ignorecase and smartcase set, if a pattern contains an uppercase
letter, the returned search becomes case sensitive, otherwise it isn't. Comes in
pretty handy.
Show status line:
set laststatus=2
Show line numbers:
set number
Show row and column:
set ruler
Smarter backspacing:
set backspace=indent,eol,start
I make use of the <leader> key as a prefix key for a number of custom key mappings
so as not to mess too much with Vim's defaults. By default this is mapped to
\.
It's a good idea to use the <leader>, as it's a way of extending the
power of vim shortcuts, in fact many plugins create their own mappings that
start with the leader. But \ is awkward to reach so I remap it.
let mapleader = ","
That way if you have a map of <leader>jd, you can perform that action with
,jd
Plugins FTW!
There are countless Vim plugins lying all over the web. And coming from other editors, you might start to feel left out. But hey don't fret it. There's always a plugin for it :)
I use Vundle to manage my plugins. It's feature packed but then allows you to never think about the process of managing plugins ever once it's set up. Just plug 'em in, even personal plugins.
Installing Vundle:
$ git clone https://github.com/VundleVim/Vundle.vim.git ~/.vim/bundle/Vundle.vim
Once you've added a plugin to your config, you can install it in vim with:
:PluginInstall
My Vim configuration is heavily geared towards Python Development, but there's some love thrown in there for JavaScript, CSS, HTML, TypeScript(read: Angular2) and Markdown. Oh and Java when I'm feeling tipsy at times :D
For appearances, I manage my colours myself, but you can easily use one of the many colour scheme plugins available. If the terminal is capable of displaying 'colours', all 256 of them, then I load my custom colour scheme:
if &t_Co >= 256 || has("gui_running")
    color mustang
endif
And to install a plugin is super simple. Lots of examples here
- vim-airline, a better status line.
let g:airline_theme = 'laederon'
let g:airline_powerline_fonts = 1
let g:airline#extensions#branch#enabled = 1
let g:airline#extensions#syntastic#enabled = 1
let g:airline#extensions#virtualenv#enabled = 1
For File Navigation:
-
ctrlp, for quick file opening. Sometimes, the only file navigation I need really. I use a leader key mapping because the default kinda conflicts with some other plugins I've set up ;). It intelligently knows where to look for the root of the project you're currently working in. You can extend it too. It's just awesome.
let g:ctrlp_show_hidden = 1 let g:ctrlp_working_path_mode = 'r' " r=nearest.git,.hg,.svn,.bzr,_darcs dirs" let g:ctrlp_open_new_file = 'v' " in a new vertical split" nmap <leader>p :CtrlP<cr> -
NERDTree, for file navigation
" toggle nerdtree file/folder tree " nmap <C-n><C-t> :NERDTreeToggle<CR> -
tagbar, for improved code outlines / navigations.
Python specific:
-
jedi-vim, awesome Python autocompletion with Vim
let g:jedi#goto_command = '<leader>jd' " goto definition or assignment let g:jedi#goto_assignments_command = '<leader>jg' " goto assignments let g:jedi#rename_command = '<leader>jr' " rename variables -
vim-jinja, jinja support.
- vim-virtualenv, for Python virtualenv support.
- python-mode, static analysis, refactoring, folding, completion, documentation, etc.
- vim-flake8, static syntax and style checker for Python.
Autocompletion:
- YouCompleteMe, is a fast, as-you-type, fuzzy-search code completion engine for Vim.
Snippets:
- UltiSnips, is the ultimate solution for snippets in Vim.
For git:
- fugitive, for git integration, I find it more convenient using git directly from the terminal as I have heavily customised my git experience there.
Editing markdown documents:
- vim-livedown, for live preview of Markdown files
- Goyo, distraction-free writing
- limelight, hyperfocus-writing in Vim
Other files:
-
syntastic, syntax checking for various file formats. You can allow Vim to check your syntax
-
vim-json, distinct highlighting of keywords vs values, JSON-specific (non-JS) warnings, quote concealing.
-
MatchTagAlways, always highlight tag pairs. Makes it easier to find closing tags in html-like filetypes.
let g:mta_filetypes = { \ 'html': 1, \ 'xhtml': 1, \ 'xml': 1, \ 'jinja': 1, \ 'htmljinja': 1, \} -
emmet-vim, html code completion.
I've left a couple of the plugins I use out of this post. You'll find them in my vim configuration. But a more exhaustive list of plugins to install can be found @ vim awesome, linked below in Resources.
⇛ Conclusion
It's my hope that at this point, I've helped demystify Vim and that your experience getting started in Vim is a lot more awesome and painless.